Storage — Game Design Document
The hideout's loot-management module: a unified stash, drag-and-drop, and furniture-driven capacity.
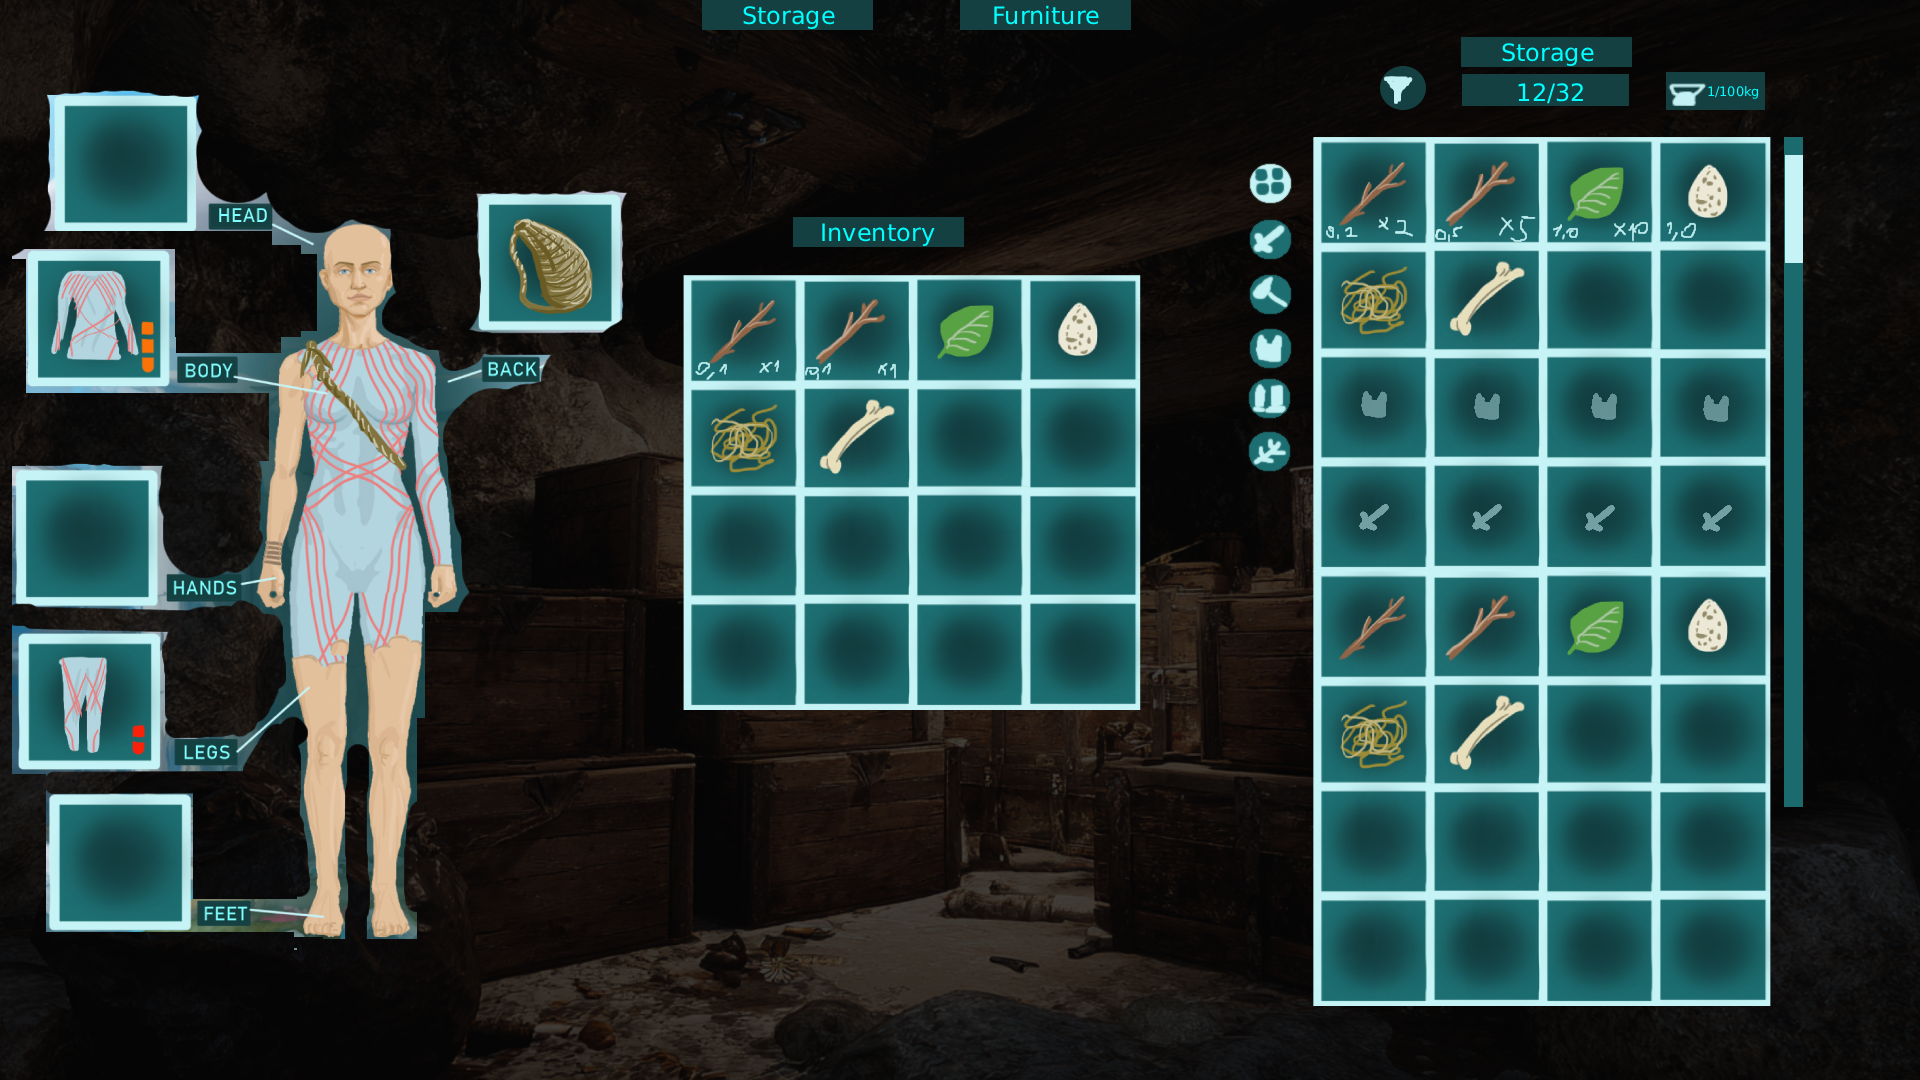
A full GDD for the Storage module of Mortalis — the hideout hub where players manage everything they extract from the arena. Covers a unified inventory/stash interface, category tabs, filtering and sorting, drag-and-drop rules, and a system where craftable furniture drives both the room's look and its storage capacity.
Made for Mortalis Game — included here with attribution, per the studio agreement.
About this document
I wrote and designed this GDD as a game designer on the Mortalis team — the storage systems, the interface flow, and the document itself. It’s shown here in full; if you’re skimming, these are the parts I’d point to first:
- Furniture drives storage. Capacity is earned by crafting and placing furniture, which changes the room’s look and unlocks or expands stash sections at the same time.
- One unified screen. Personal inventory and stash sit side by side, with category tabs, filtering and sorting, and drag-and-drop between them.
- Progress you can see. Upgrading the module visibly transforms the room from cluttered to clean, tying function to fantasy.
The complete design document follows.
Storage is one of the hideout modules. It allows players to store and manage their loot between fights in the arena. It serves as the central hub for item management — everything the player collects during a run is handled here.
Core concept
The Storage System is designed to support the game’s extraction loop while reinforcing the shelter fantasy: a safe home, a personalized space, and a place of tangible progress.
The key design idea is that furniture drives both aesthetics and function. When the player crafts and places a storage furniture piece, two things happen simultaneously: the physical look of the hideout room changes, and the storage interface gains new functional sections. Progress is visible and felt.
The system is built around four pillars:
- One unified interface — inventory and stash shown side by side in a single screen.
- Craftable and placeable furniture — storage capacity is earned through crafting, not automatically granted.
- Category-based specialized tabs — dedicated sections for weapons, armor, ammo, etc., keeping loot organized.
- Filtering and sorting tools — quick access to specific items without manual searching.
System consist of 3 parts:
Furniture Part — there desribed furniture types, furniture slots, placing and removal logic.
Storage Part— there described storage limits, slots, tabs, filtering and sorting.
Inventory Part— there described UI, drag and drop mechanic and slots.
Interface structure
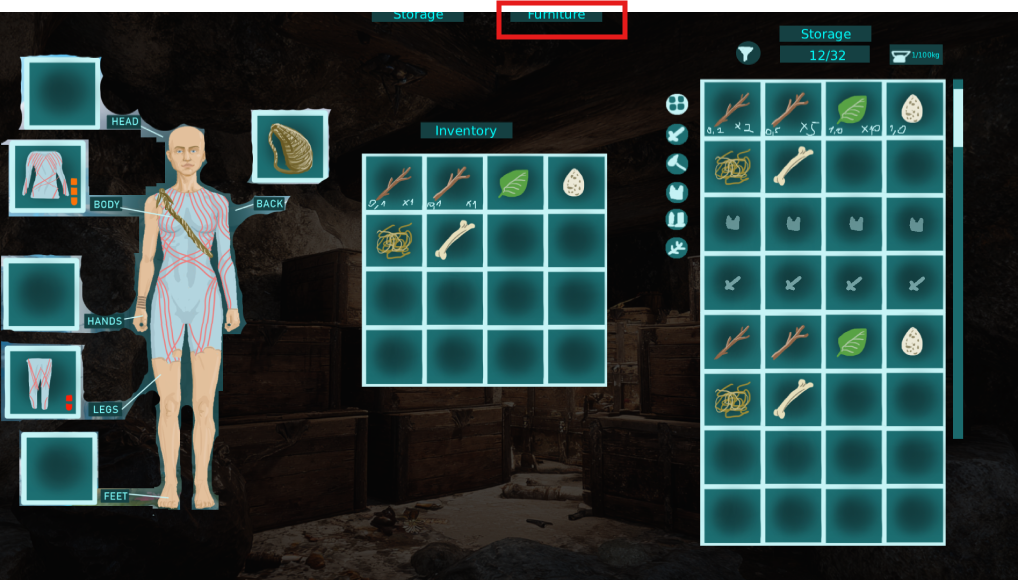
The Storage screen is divided into three main parts displayed side by side:
-
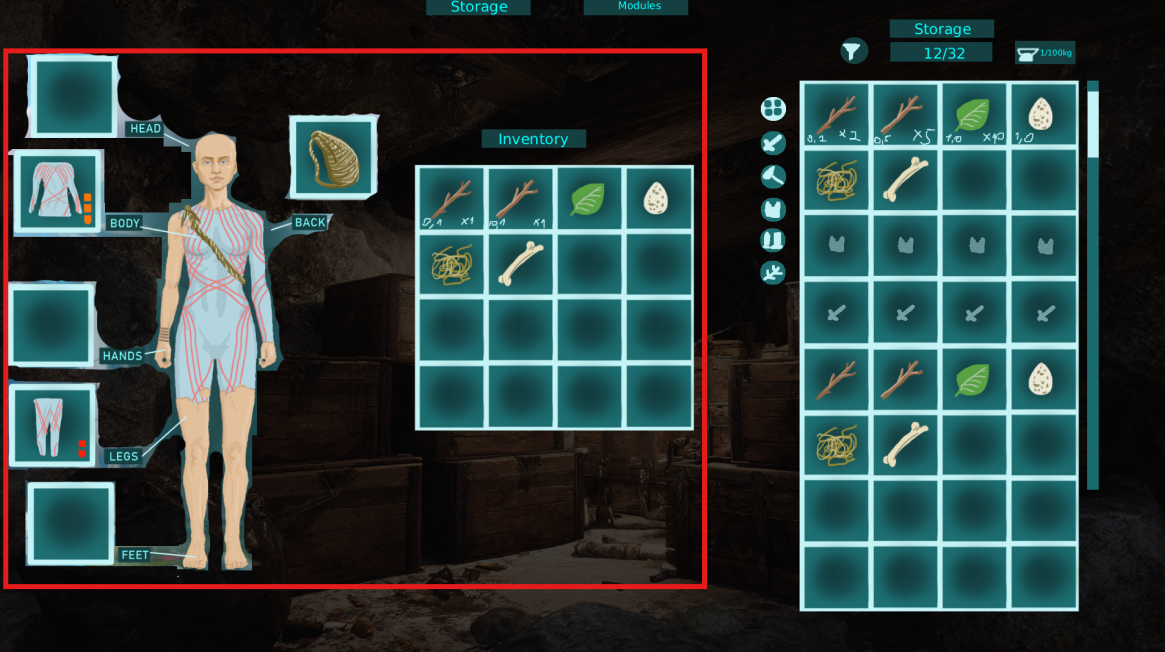
Inventory Part (left panel) — shows the player’s current personal inventory. Items carried from the latest run appear here.
-
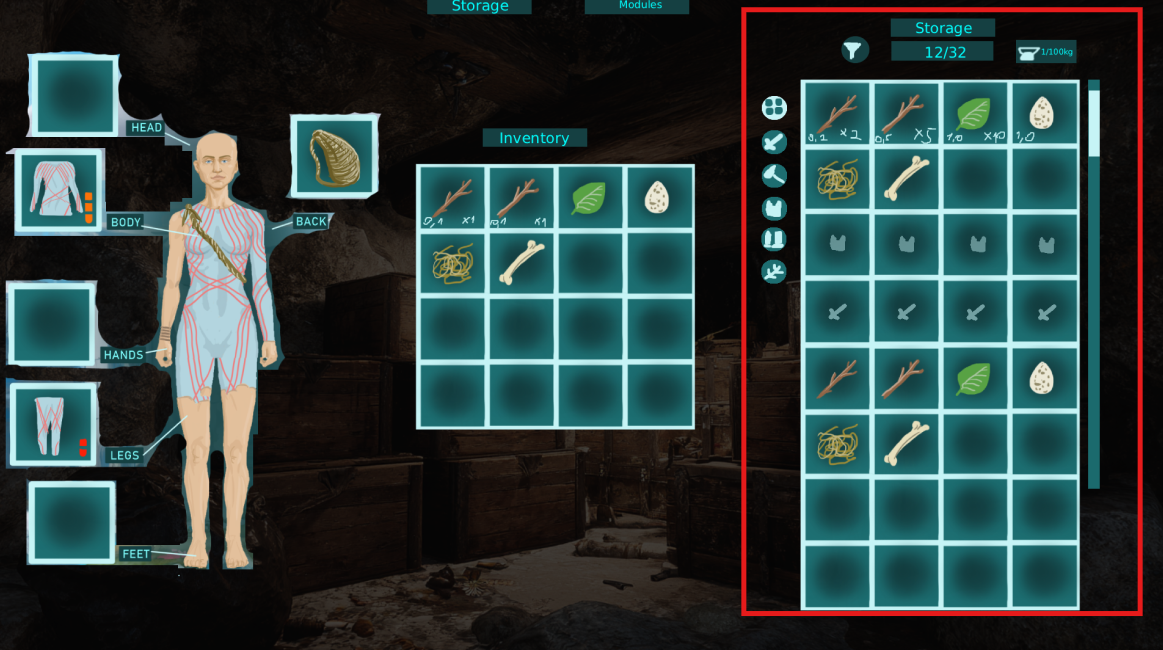
Storage Part (right panel) — shows the stash content, organized into tabs. Items placed here persist between sessions.
-
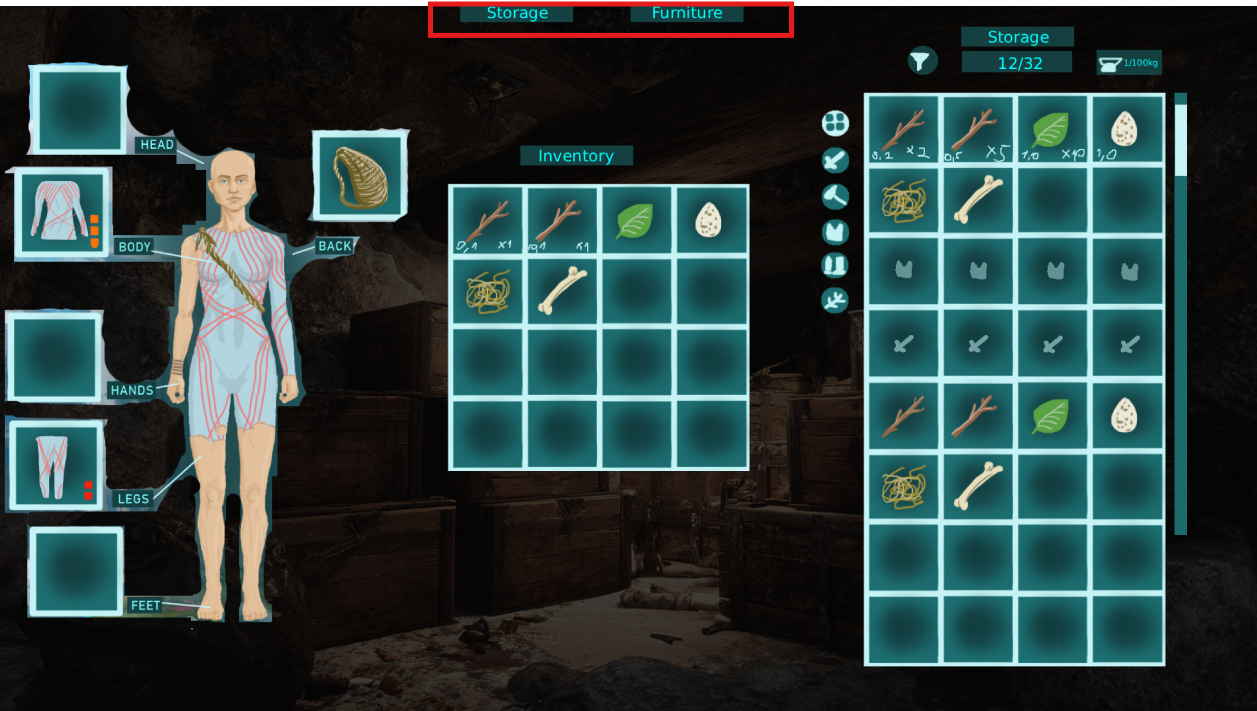
At the top of the screen, navigation buttons allow switching between two modes: the Storage Inventory view (items) and the Furniture Part view (where furniture slots are managed).
Access & Interaction
How to Open Storage
Requirement:
- Completes the tutorial.
- Creates a Storage module via the Hideout Terminal.
Action:
- Walks up to the Storage in the hideout room and presses [Interact].
Result:
- The unified Storage screen opens, showing the player’s inventory on the left and the stash on the right.
- Storage is visible behind the UI.
- Player UI and interaction button hides.
Storage Progression
The Storage module can be upgraded through the Hideout Terminal. Upgrading changes not only the functional capacity (number of furniture slots) but also the visual state of the room — from a cluttered, messy space to a clean, fully operational storage area.
| Module Level | Furniture Slots | Room Visual State |
|---|---|---|
| Level 1 | 3 | Most of the space is littered with rubbish and looks untidy. |
| Level 2 | 5 | Most of the rubbish has been removed; the free part is clean. |
| Level 3 | 8 | Storage is fully available, clean, and tidy. |
Furniture slots are the designated positions in the room where storage furniture can be placed. More slots = more furniture = more stash tabs and capacity.
Scene & Audio
Scene
- The Storage is located inside the Hideout.
- When the player interacts with storage, the physical room is visible in the background behind the UI.
- The room is lit by a combination of natural and artificial lighting.
Audio
| Event | Sound | Example |
|---|---|---|
| Furniture placed | Soft mechanical click when placing furniture | |
| Weapon rack placed | Metallic sound for weapon racks |
| UI interaction (click/hover) | UI click / hover sound | | | Item dropped into stash | Item drop sound |
Storage Part
The Storage Part is the right panel of the Storage screen. It shows the contents of the player’s stash — items that persist between runs. The stash is organized into tabs, each corresponding to a category of items and unlocked by placing matching furniture in the hideout.
Panel Layout
The stash panel consists of the following elements, from top to bottom:
-
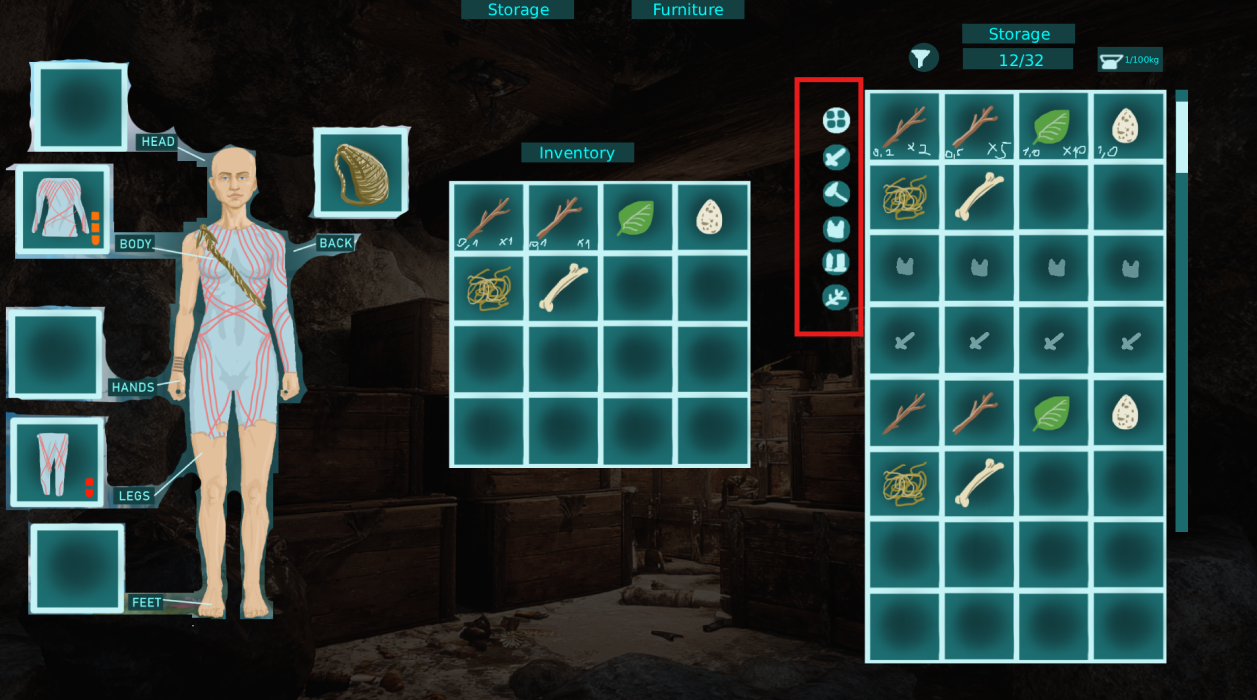
Tabs— vertical row of tabs. Each tab represents a storage category. The active tab is highlighted; clicking a tab switches the view to its contents.
-
Slot counter — Displayed as
[occupied] / [total], e.g.12 / 32. Updates in real time as items are added or removed. Each tab has its own counter reflecting only its own slots.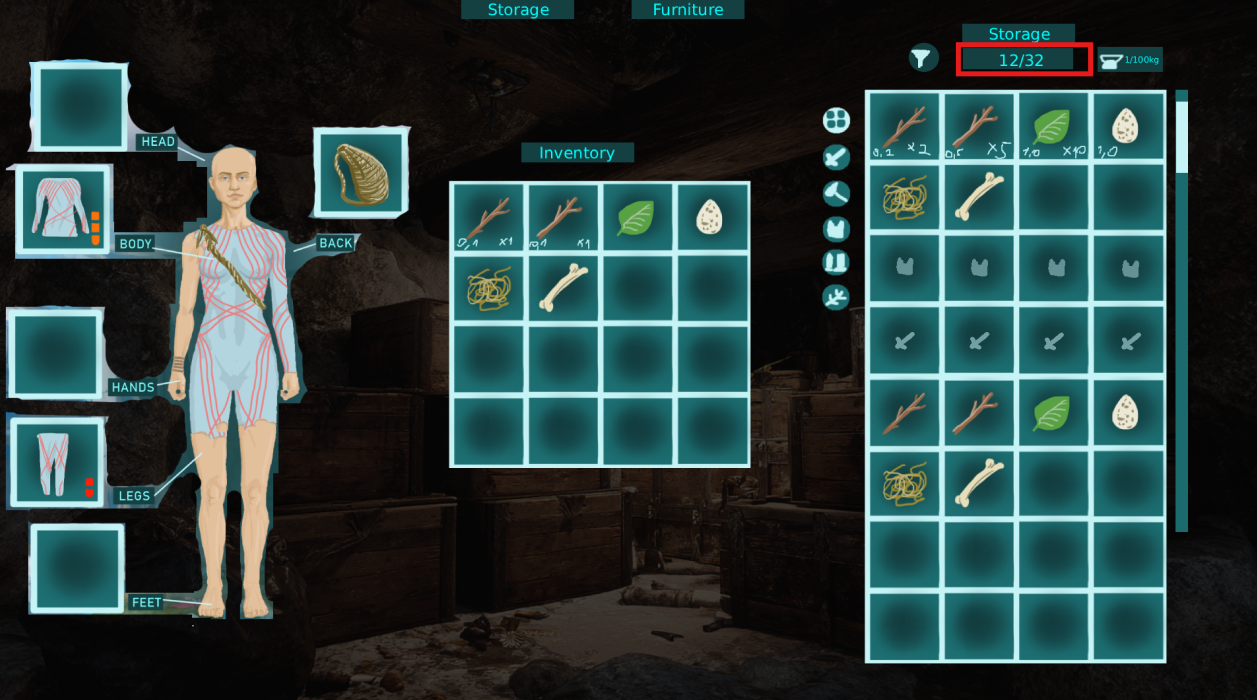
-
Weight counter — Displayed as
[current weight] / [max weight] kg, e.g.1 / 100 kg. Only visible on the General tab. Specialized tabs are weight-independent — items there do not appear in this counter regardless of how heavy they are.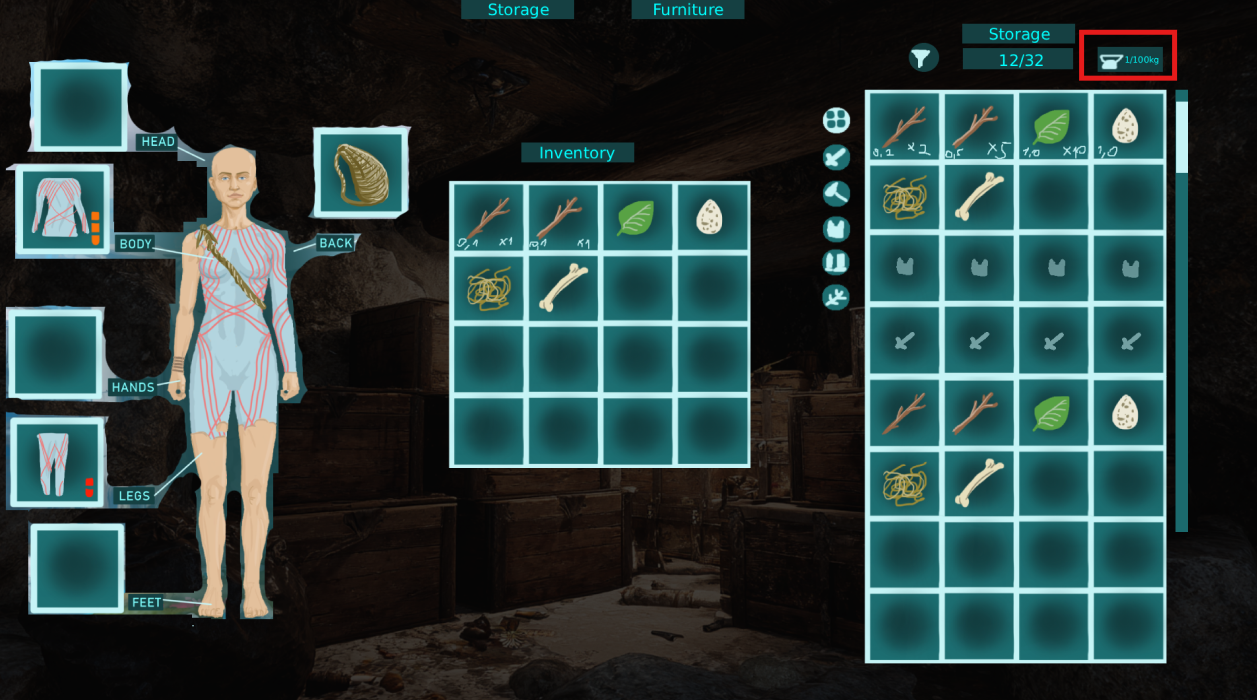
-
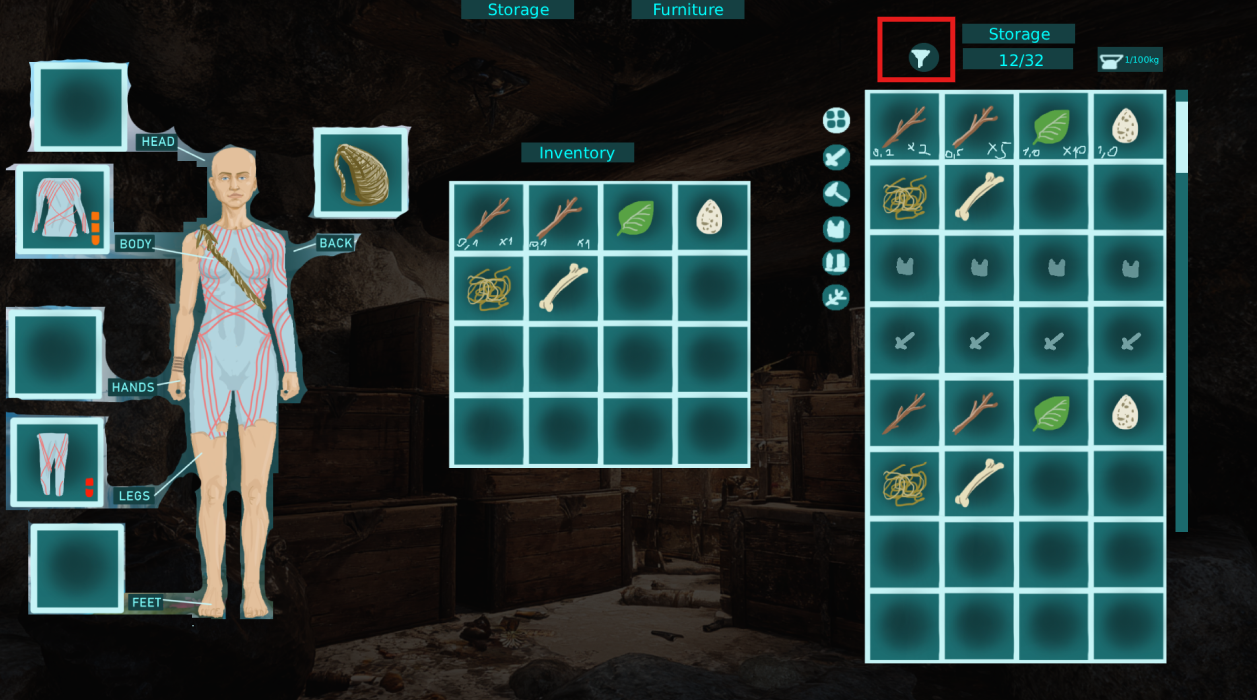
Filter & Sort button — opens the filtering and sorting options panel.
-
Item grid — the main content area showing all items stored in the active tab.
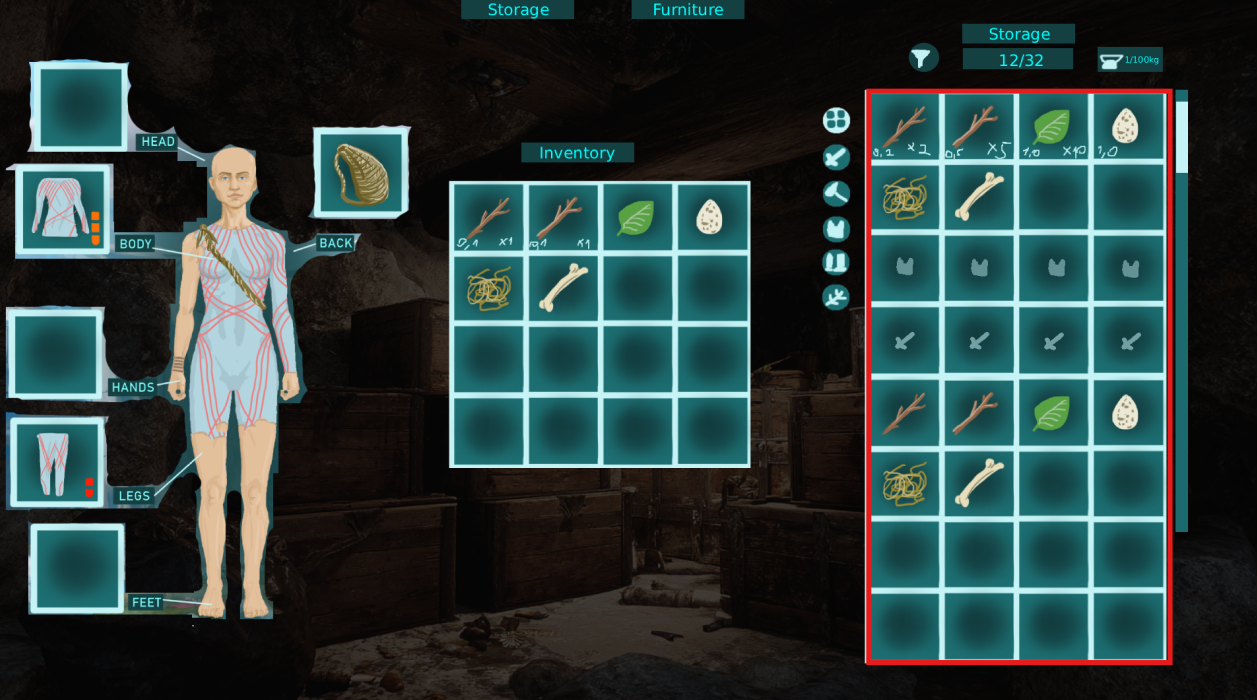
Tabs
Tabs divide the stash into logical sections. There are two types of tabs: the General tab (always present if a General furniture; wooden crate; is placed) and Specialized tabs (unlocked by placing corresponding furniture).
General Tab
The General tab accepts any item type and is the default drop destination. It has both a slot limit and a weight limit — unlike specialized tabs, the total weight of items stored here is tracked and capped.
- Default capacity per placed General module: +24 slots, +32 kg weight allowance.
- Multiple General modules stack: placing 2 gives 48 slots and 64 kg, etc.
- Weight counter is visible only for this tab.
Specialized Tabs
Specialized tabs are unlocked by placing specialized furniture in the hideout. Each tab accepts only items of its corresponding category. Items stored in specialized tabs do not count toward the General tab weight limit.
| Tab Name | Accepted Item Category | Slots per Furniture Piece | Furniture Visual |
|---|---|---|---|
| Weapons | Weapons only | +8 | Wall-mounted weapon rack |
| Armor | Armor only | +8 | Armor stand / rack |
| Ammo | Ammo only | +8 | Ammunition box / ammo crate |
| Resources | Resources only | +8 | TBD |
| Consumables | Consumables only | +8 | Cabinet / cupboard with shelves |
If the same type of furniture is placed more than once, the existing tab expands by +8 slots rather than creating a duplicate tab. For example, placing a second weapon rack adds 8 more weapon slots to the existing Weapons tab.
Item Display in the Grid
Each item cell in the stash grid shows:
-
Item icon — visual representation.
-
Weight & quantity label — e.g.
0.2 kg ×2(total weight of the stack + number of copies). A single item shows only its weight. -
Rarity / quality indicator — (TBD, border color or badge).
-
Item name — displayed on hover.
-
Item description — displayed on hover.
-
Item tags — displayed on hover (e.g. armor, weapon, legs, head, etc)
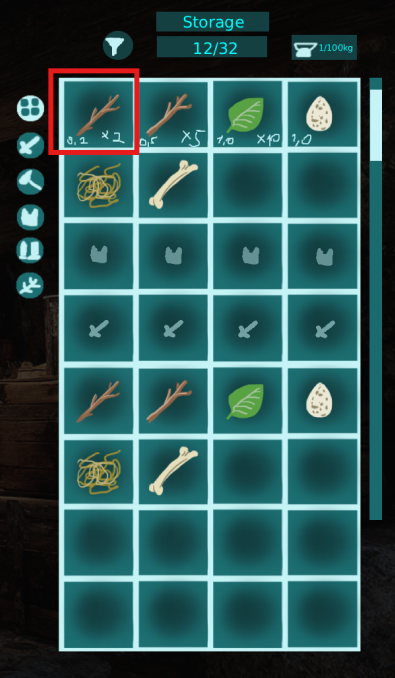
Tab Auto-Open (Drag Hover)
Action:
Player click on item and don’t release LMB (to drag item)
Player coursor with dragged item hover over tab for 0.5 second
Result:
Opens tab that cursor is hovering over
Filtering & Sorting
The Filter & Sort panel opens by pressing the Filter & Sort button in the stash panel. It allows narrowing down the displayed items and reordering them.
Filtering Options
| Filter Type | How It Works | Options |
|---|---|---|
| Type Filter | Dropdown — select a category to show only items of that type | Weapons, Armor, Resources, Consumables, Ammo |
| Name Filter | Text input — type any part of an item name; results update in real time | Free text |
Filters can be combined: e.g. select Type: Weapons and type “rifle” in the name field to show only rifles.
Sorting Options
| Sort By | Directions |
|---|---|
| Quantity | High → Low / Low → High |
| Quality | High → Low / Low → High |
| Weight | High → Low / Low → High |
Sorting applies within the currently active tab and respects any active filters.
Inventory Part
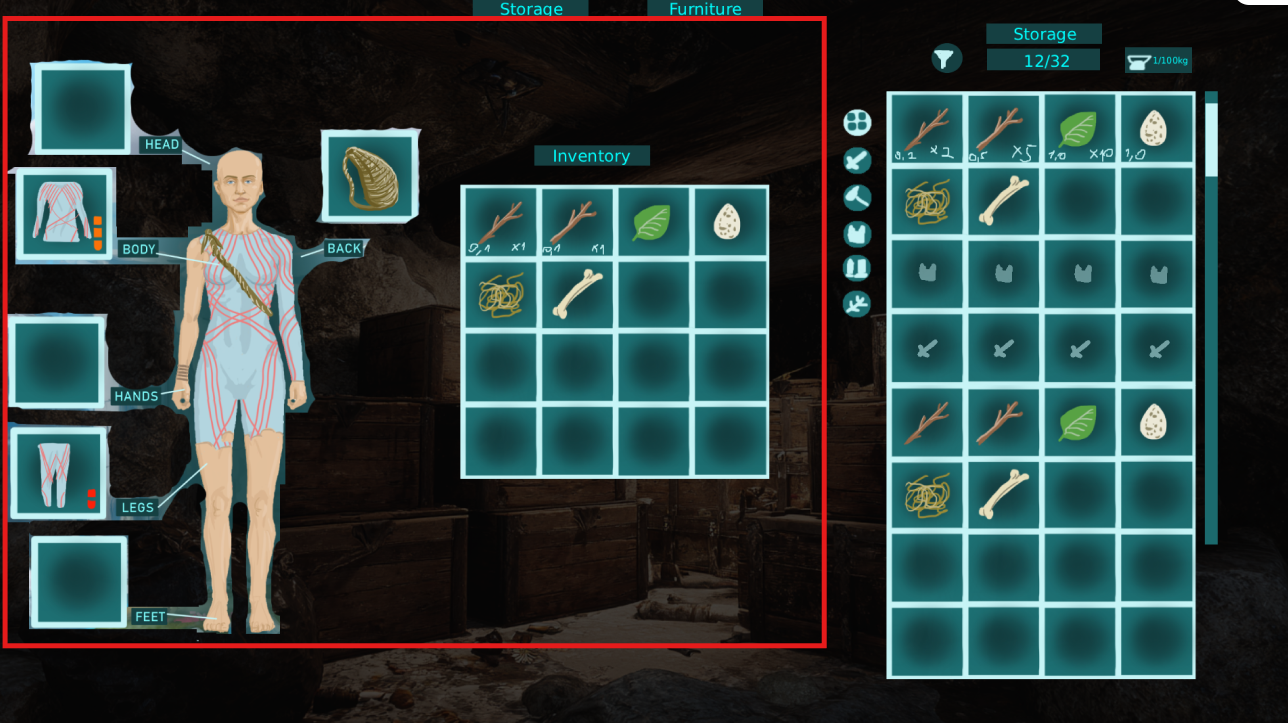
The Inventory Part is the left panel of the Storage screen. It shows the player’s personal inventory — all items currently carried on the player’s character. From here, the player can review what they brought back from a run and transfer items into the stash.
Panel Layout
The inventory panel displays items as a scrollable grid. Each item cell shows:
- Item icon — visual representation of the item.
- Item name — displayed on hover.
- Item description — displayed on hover.
- Item tags — displayed on hover (e.g. armor, weapon, legs, head, etc)
- Weight & quantity — shown as e.g.
0.2 kg ×2, meaning 2 copies of the item with a combined weight of 0.2 kg.
On the left from inventory is displayed player character and it gear. Avaible slots include:
- Head
- Body
- Hands
- Legs
- Feet
- Back
Only items with corresponding tags can be placed in this slot (e.g. in legs slot can be placed only items with tag “legs”)
Drag & Drop
The way to move items between the inventory and the stash is drag & drop. The player clicks and holds an item, physically drags it across the screen, and releases it in the target location.
- Click and hold on an item in the inventory panel. The item “lifts” from its slot — a ghost image of the item follows the cursor.
- Drag the item across the screen toward the storage panel on the right.
- Hover over a valid target:
- An empty slot in the stash — the slot highlights to indicate it can accept the item.
- A stash tab header — the tab activates after a short hover (see Tab Auto-Open).
- Release the mouse button to drop the item into the highlighted slot.
Invalid Drop Targets
Not every slot accepts every item. If the player tries to drop an item in an incompatible location, the slot shows a red highlight and the drop is rejected — the item returns to its original slot.
- A Weapons tab slot rejects armor, ammo, or any non-weapon item.
- A full slot (occupied by another item) rejects the drop unless stacking is allowed.
Stacking
Items of the same type can stack in a single slot. When the player drops a stackable item onto an existing stack of the same type, quantities merge automatically.
Transfering items
Action:
Player drags an item from the inventory panel (left) and drops it onto a valid slot in the storage panel (right).
Result:
- Item disappears from the inventory grid.
- Item appears in the target stash slot.
- Stash slot counter updates (e.g.
12/32→13/32). - If the item goes to the General tab, the weight counter updates accordingly.
Action: Drags an item from the storage panel (right) and drops it back into the inventory panel (left).\n\nResult:
- Item is removed from the stash.
- Item appears in the inventory grid.
- Stash counters update accordingly.
Hotkeys:
- Player can fastly transfer item from inventory to storage and from storage to inventory by pressing hotkey (e.g. CTRL+LMB)
- Player can divide stack in halfs by pressing hotkey (e.g. CTRL + MMB)
Furniture Part
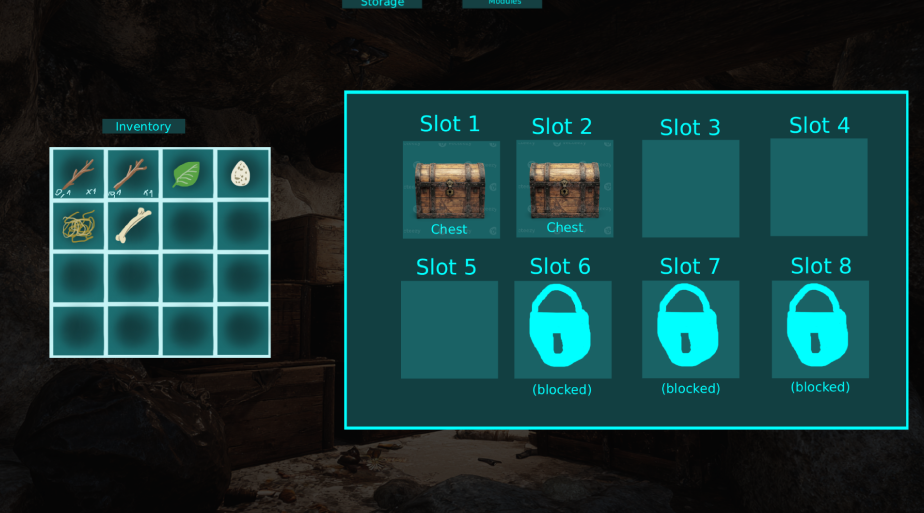
The Furniture Part covers all mechanics related to storage furniture: how it’s placed in the hideout, how it expands the stash, and how removing it affects stored items. Furniture is the core driver of storage progression — the player cannot increase their stash capacity without crafting and placing it.
What Is Storage Furniture?
Storage furniture is a set of physical objects the player can craft and install inside the hideout storage room. Each piece serves two roles:
- Visual: Appears as a real 3D object in the hideout room, making the space look lived-in and personalized.
- Functional: Unlocks or expands a stash tab in the Storage UI, giving more item slots (and weight capacity for General furniture).
There are two categories of furniture: General and Specialized.
Furniture
| Furniture Name | Category Tab Affected | Visual Description |
|---|---|---|
| Weapon Rack | Weapons | Wall-mounted rack with brackets/holders for hanging weapons. |
| Armor Stand | Armor | Standing frame for displaying and storing armor pieces. |
| Ammo Crate | Ammo | Reinforced ammunition box / ammo crate. |
| Storage Cabinet | Consumables | Cabinet / cupboard with open shelves. |
| Resource Shelf | Resources | TBD |
| Wooden Crate | General | Crate made from wooden planks |
Furniture Slots
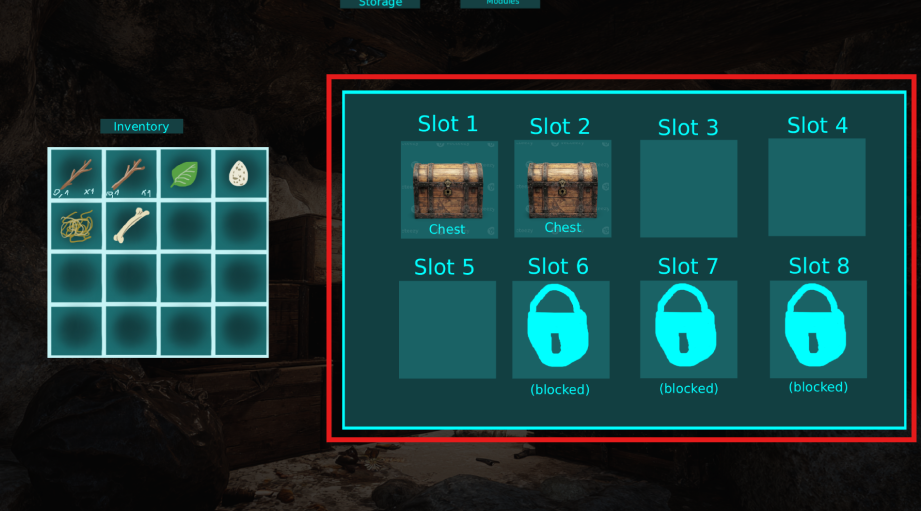
The hideout storage room has a fixed number of furniture slots — designated positions on the floor or walls where furniture can be placed. The number of available slots depends on the Storage module upgrade level:
- Level 1: 3 furniture slots.
- Level 2: 5 furniture slots.
- Level 3: 8 furniture slots.
Slots that are not yet available (due to module level) are grayed out and uninteractable. The player cannot place furniture in a locked slot.
Placing Furniture
Requirements:
- The furniture item must be present in the player’s inventory (crafted at the Workbench beforehand).
- At least one furniture slot must be free and unlocked.
Action:
- Opens the Storage screen and switches to Furniture Menu using the navigation button at the top.
- The view shows the Furniture Menu with all furniture slots visible.
-
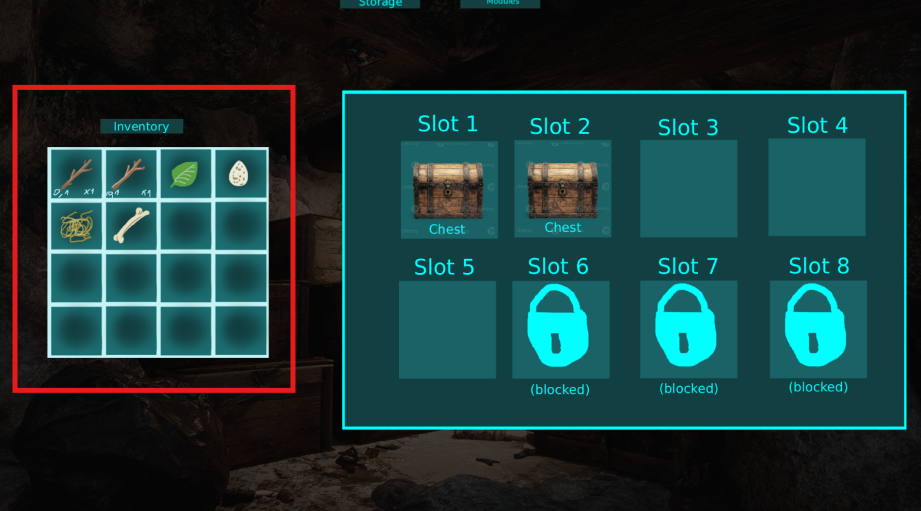
The player’s inventory (side panel) shows available items, including furniture.
-
Player drags a furniture piece from the inventory and drops it onto a valid (unlocked, empty) furniture slot in the room.
Result:
- The furniture appears physically inside the hideout room at the chosen slot position.
- The Storage UI updates: a new category tab is created, or an existing tab is expanded.
- A placement sound plays.
Removing & Relocating Furniture
Furniture is not permanent — the player can remove or move it at any time.
Removing Furniture
Action: Drag and drops furniture from slot in furniture menu to inventory.\n\nResult:
-
Applies Overflow rules
-
The furniture object disappears from the room.
-
The corresponding stash tab loses the slots that furniture provided.
-
The furniture item returns to the player’s inventory.
Relocating Furniture
Player does: Drags a placed furniture piece from its current slot to a different available slot.\n\nResult: Furniture moves to the new position. The stash tabs are unaffected (same furniture, different position).
Overflow Rules
Removing furniture that has items stored in its tab can cause an overflow — more items than the remaining capacity allows. The system handles this as follows:
- When furniture is removed, the system checks if the remaining slots are sufficient for all items in that tab.
- If there is an overflow, excess item stacks are automatically moved to the General tab.
- If the General tab also does not have enough free slots to absorb the overflow, the removal is blocked. The player must first free up space before removing the furniture.
- The player will see a warning message if removal is blocked due to overflow.
Crafting Furniture
All storage furniture is crafted at the Workbench. Crafted furniture goes directly into the player’s inventory, from where it can be placed in the storage room.